Background

Tuesday, July 5, 2011

Covered Wooden Letters


Hi there Bloggers! Happy Summer. My daughter recently returned from a month away visiting her grandparents and so my hubby and I decided to take this time and re-do the theme in her room. She had expressed an interest in the Peace signs before she left so we decided to make her a "peace" room with a semi 60's feel. All the happy colors without the happy "magic". LOL

I found these wonderful wooden letters at JoAnn's the other day when I stopped by on a whim. I loved how they had that 60's feel to them! I used Stampin' Up's Designer Paper in Brights to cover all the letters and then attached chipboard accents that I covered and glittered as well. They came out too cute!

Happy creating!

Materials Used:
  • Wooden letters
  • Stampin' Up Designer Paper stack - Brights Collection
  • Tim Holtz Distressing Ink - Tea Dye
  • Chipboard accents
  • Scrap scrapbook paper
  • Glue - Elmer's and Zig
  • Martha Stewart Glitter
  • Pencil to trace
  • Scissors to cut
  • Nail file to sand edges down

Saturday, May 21, 2011

Never Ending Birthday Card - Alice In Wonderland

Front

Fold 1

Fold 2

Fold 3 (Back)
Hi everyone! Summer is rushing at me at full speed and with it comes lots of end of the school year work for some reason. I know it's been awhile since I've posted and I still haven't had a chance to post pics from the Stamp-a-Stack (cringe), but, now that I'm done with Alice In Wonderland (no more late night rehearsals!!! WOO HOO!) things are starting to slow down just a hair. LOL.
My daughter is at an Alice In Wonderland themed birthday party for a friend's daughter who is turning nine and I wanted to make her a birthday card that fit with her theme .... never ending card!!! This took two days to make and I wanted to share this bit of advice .... Don't use card stock on everything! I was building layer after layer out of card stock and then when I went to fold it all ... wrinkles and heartache! If I had started the card sooner rather then later, I would have had time to go make another one, but, since I started it yesterday afternoon and we needed it today ... I made it work. LOL. They can be made into a 4.25 x 5.5 size but I wanted it to be big and in your face so I made mine a 6 x 6.

Happy Crafting!

Materials Used:
  • Paper - White, blue, green, pink, purple, yellow
  • Scrapbook paper - Pink, blue, purple
  • Coloring pages (Digital)
  • Watercolor pencils
  • Blender pens
  • Stamps and Ink
  • Scoreboard
  • Paper cutter
  • Adhesive

Saturday, May 7, 2011

Butterfly Trash Bins


Okay Bloggers, I TOTALLY fell in love with this butterfly card that I made about a month or so back. I love it so much that I used it as my inspiration to make these cute personal trash bins for my friend Lynn to use while she's hosting her workshops. The idea is that they sit on the table next to each person and they can just put their trash into them instead of leaving the clutter on the table. Are they cute or what!?!!? I got the idea from an old crayola chalk tub that I use. :)

Happy Creating! And for those of you in my area going to the Scrap-a-Stack tomorrow (or should I say later today ... LOL) SEE YOU ALL THERE!! Can't wait! Just finished packing my "bag" full of tools and adhesive! Woo hoo!

Materials used:
  • Empty coffee container (you can wash them, but mine smelled like butterscotch so I left them)
  • Parchment paper
  • Pink and Green card stock
  • Butterfly dies
  • Border punch
  • Background stamp
  • Green ink pad
  • Glitter (you can't really see it in the picture but the wings are all tipped to sparkle)
  • Twine
  • Rhinestones
  • Clear label that reads "Trash"
  • Adhesive

Tuesday, May 3, 2011

Mother's Day Flower pots

Here's the other card we made at the workshop for mother's day. Too cute!!

Materials Used:
  • Yellow, Brown and White Cardstock
  • Stampin' Up stamp set - A Flower for All Seasons
  • StazOn Ink - Black
  • Stampin' Up watercolor pecils
  • Stampin' Up Blender pens
  • Ribbon
Here is a link to Lynn's website: http://www.stampinup.net/esuite/home/purplepassiondesigns/

Just buzzin' by ....

Last weekend, my friend Lynn had her first workshop ever and we had SUCH a blast! We made two cards and a candy sleeve pull card (I didn't post a picture of that since I already have one on another post).

Again, I'll need to get a complete list of materials from her, but here's what I can remember from the top of my head:

Materials Used:
  • Yellow and white cardstock
  • Yellow patterned paper
  • Bee stamp set
  • StazOn ink - Black
  • Stampin' Up Watercolor pencils
  • Blender pens

Easter Chick - "Hoppy Easter"


Hi everyone! Oh my goodness WHERE has the time gone?? So, I have a few moments while the water is boiling for dinner so I thought I would catch up on all my picture postings of what I've been up to lately. There will be more following, I just have to take them off my phone first. LOL.

So, I was over at the happiest place on Earth (a.k.a. Lynn's house) playing around with all her cool new doodads and we made this cute card! We could write whatever sentiment we wanted and since I was going for an Easter theme on mine, I REALLY wanted to use "Hoppy Easter" so, I went outside of the box, free handed some bunny ears and added them to my chick! LOL. I think he came out too cute!

I need to find out what products we used so that I can add a materials list for you guys or, you can email her directly: lmycraftycorner@yahoo.com. Here's her website in case you would like to look around a bit: http://www.stampinup.net/esuite/home/purplepassiondesigns/

Happy Crafting! 

Saturday, April 9, 2011

Just Because Card - Butterflies


Hey guys! Here's yet another card we made at the open house! This, by far, was my FAVORITE!! It's so breathtaking in it's simplicity! I made two different versions of the same card. The card on the left is completely glittered on the butterfly and the butterfly on the card on the right only has glitter on the outer edges of it's wings. Both are stunning in person.

Materials Used:
  • Card stock - Cream, pink and green
  • Background stamp
  • Green ink
  • Rhinestones
  • Twine
  • Butterfly dies
  • Embossing folder
  • Glitter
  • Glue
  • Adhesive

Happy Birthday Card - Masculine


Hey guys! Here's another card that we made at the open house I attended. It's a birthday card for a guy. I love the colors of this card!

Materials Used:
  • Card stock - Kraft, Purple, White
  • Stamps - Background and Sentiment
  • Brads
  • Scalloped square punch
  • Pop up dots
  • Purple Ink
  • Adhesive

Friendship Card - Flowers and Bees


Hey guys! My friend Lynn has become a Stampin' Up demonstrator and she recently had an "open house" at her house where we had SOOOOOO much fun! We made a ton of cards and played with so many new and exciting products. :) We made this cute friendship card. I made my card to pop up but we didn't have to. I can't remember all the exact names of all the products we used so bear with me ...

Materials Used:
  • Card stock - Pink, red, white, green
  • Stamp set
  • Stampin' Up markers
  • Distressing tool
  • White ribbon
  • Oval punch
  • Oval scallop punch
  • Adhesive

Cupcake Birthday Cards

Stack of Cupcakes

Single Cupcake

Hey guys! I've been over to Lynn's house to play with all her cool new Stampin' Up stuff. She recently became a demonstrator and this lucky blogger has gotten to help her break in and test out some of her new items! Who wouldn't like that?! :P

Materials Used:
  • Card stock - Green, Blue, Magenta, Purple
  • Watercolor pencils
  • Blender pens
  • Glitter
  • Pop up dots
  • Paper crimper
  • Black Ink pad
  • Yellow Ink pad
  • Dauber
  • Cupcake stamp set
  • Adhesive

Hershey's Nuggets holders for Easter - Chicks

Front View

Side view to show the nugget

These are the CUTEST things ever!!! I saw them in a blog that my friend Lynn shared with me and I HAD to make them. Using the Stampin' Up punches made these little guys even easier to make! Who doesn't love a quick and easy project?! I DO! I DO! Now, I'm gonna make these little guys for my daughter's class for Easter. :P

Materials Used:
  • Card stock - Yellow, orange and black
  • Scalloped circle punch
  • Paper crimper
  • White gel pen
  • Hole punch
  • 6-sided flower punch
  • Corner punch
  • Black pen
  • Adhesive
  • Scissors

Monday, April 4, 2011

Tri-Fold Thank you card with Flower

Front of the card


The inside of the card with it's pull out insert

Envelope made to match


Hi everyone. One quick post before I'm off to bed... I made this thank you card for my principal tonight. I saw these tri-fold cards online and just had to make one! So cute and soooooo easy!! Who doesn't love that?! :D

Materials Used:
  • Scrapbook paper
  • Thicker cardstock
  • Blue paper
  • Loose paper flowers
  • Brad
  • Crop a dile
  • Glitter (of course! :P)
  • Adhesive

Chocolate Slider Card

The "outside" of the card


The "inside" is revealed once the bar is pulled out

Hi everyone! It's been awhile since I've been able to post, let alone make, anything. My hubby decided that he wanted the computer room to be a guest room so we've been busy moving it out to it's new home (the front room). I decided that if we're moving it all, I might as well get a new work area out of it! LOL. So, we've been busy building like mad! It's coming along nicely and I can't wait until I can start working on my new desk area. :P

In the meantime, I've managed to sneak over to my friend Lynn's house to make this cute card that I've decorated to give to my secret pal... shhh ... she loves chocolate and we just got back from a two week spring break so this little guy will be waiting for her in her box. I'm sure she'll love it!

Thanks for looking and have a great day!

Materials Used:
  • Stampin' Up paper - Crumb cake
  • Stampin' Up stamp pad - Early Espresso
  • Stampin' Up stamp set - Eat Chocolate
  • Brown Ribbon
  • Piece of plastic grocery bag
  • Chocolate bar
  • Adhesive

Thursday, March 24, 2011

St. Patty's Day Tin

Hi everyone! I made this cute little tin for my secret pal for St. Patrick's Day. I filled it with mint candies because they were green! I made the clovers using hearts that I cut with the Cricut that I chalked and scored then assembled. I think they came out so cute! Can't wait to show you what I have planned for next month! :) Let's just say the Easter Bunny is going to get SUPER creative with eggs! :)

Materials Used:
  • Tin
  • Green scrapbook paper
  • Orange scrapbook paper
  • Scrap paper
  • White RicRac
  • Green flowers
  • Green holiday themed wire
  • Hot glue
  • Cricut machine
  • Cricut Cartridge - George & Basic Shapes
  • Brown chalk

Monday, March 7, 2011

Magic Card - Happy Birthday

Before the magic
Wow! It's all filled in with color!
What's that? A magic card? You've never heard of one? Well, they are just as awesome to make as they are to receive! (After completing mine I realized that I need to remake it because I made a piece to wide and it wasn't letting all the wording show, but I still wanted to share it with you guys.) This is for my daughter's friend who has a birthday coming up. You'll notice that the cupcake in the window is just black and white but when you pull up on the ribbon ... TA-DA!!! It's not only colored in but it has glitter and words that weren't there before!

Materials used:
  • Stampin up card stock - Pear Pizazz
  • White and pink card stock
  • Ink
  • Stamps
  • Punches
  • Adhesive
  • Ribbon
  • Markers
  • Glitter

Sunday, March 6, 2011

Flip Card - Baby Shower Invite Tester Card

The front before it's opened

The "flip" in action

The new panel exposed


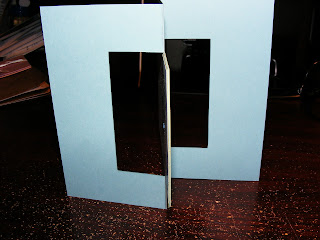
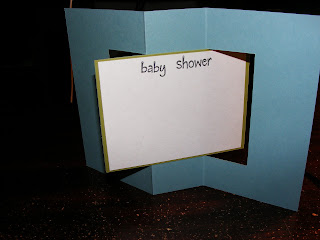
Hi everyone! WOW DO I HAVE A MILLION NEW CARD IDEAS!!!! But, for now, I'm being considered by a client for her daughter's baby shower invitations (I had made all her wedding invitations as well). I designed this bear flip card in blue and green but those colors aren't cemented. I just liked how they looked so I went with it (plus, I had them left over from when I made my Christmas cards last year). It's blank at the moment and not 100% what I would like to do, but it's to give her an idea of what I have in mind. In my mind, the final product will have:
1. Where the blue paper is (the base) I want it to be embossed (think textured paper).
2. The bear will be embossed with a nice black finish.
3. The word "baby shower" will be embossed as well.

For right now, the materials I used are:
  • Stampin' Up cardstock in Baja Breeze and Pear Pizazz.
  • White cardstock
  • Martha Stewart Glitter - blue sapphire
  • Stamp - Bear and sentiment
  • Prismacolor pencil - Light Cerulean Blue #PC904
  • Blending stump
  • Black ink
  • adhesive

Tuesday, March 1, 2011

Mini Albums - Nutcracker Cookies 2010


All the albums completed. Each cookie got one in the
color of her costume.
 I really wish I could post all the pictures of the whole book, but there are a TON of them! I made these as gifts for my daughter's Nutcracker group who were Cookies. 
One of the mini pages with a tag. The cupcake in the corner
holds the tag in place.

 I decided to make the books sweet themed because in the story, the Cookies were from the Land of the Sweets. Enjoy!

One of the larger pages with a pocket to hold these cute
cookies in. On the back of each cookie is a topic for the
dancer to write about.


This is one of my favorite mini pages. I made all the
embelishments from scratch.


Waterfall pages. The "5" page has this cute matchbook
album attached to it. A mini book inside a book! Inside
are 4 pockets with 4 tags.

One of the many pull out photo mats. Behind the mat is a
spot for journaling. The mat is held down in the corner
by these cute candy buttons.

Friday, February 11, 2011

Award Ribbons

Hi all. This is my last post for the night because I HAVE to get to bed! LOL.

My daughter's class is going to be voting on their favorite science fair project so I thought I'd make these cute paper "ribbons" using the Tim Holtz paper rosetta template and the Cricut. I think they came out super cute! I hope the kids like them (I also made an extra set for myself for scrapbooking ... LOL).

Thank you Lynn, over at Purple Passion Designs, for letting me come over late tonight and using her template. Now that all this is done, I can finally finish those mini albums from the Nutcracker and get them posted for you all. Sweet dreams!

Candy bouquet for my secret pal

Hi everyone! This is the candy bouquet that I made for my secret pal using her favorite candy! I'm not sure if you can see it really well, but the cellophane has ladybugs on it and I painted the pot red and black to match them. Normally, I paint black dots but since it's a Valentine's Day gift, I changed them to hearts. That's her card from the last post perched up top there.

Quick Valentine's Day Card for my secret pal

Hi everyone. Just wanted to share a quick card that I made using the Cricut and the Wild Cards cart. This card is for my secret pal at work for Valentine's Day. It matches the gift that I made her. I just LOVE this cart because you can cut out matching envelopes! And don't worry if you only have the personal sized Cricut (like I do) because even on a smaller scale, they still make SUPER cute note cards. The while on the envelope is actually the liner showing through. :)

My Daughter's science fair project board

The whole board

Close up of the headers - before


Close up of the headers - after
 Okay, so I should totally be in bed right now but I wanted to post what's been keeping me away. The science fair. I don't really help my daughter with the project because that wouldn't be fair but who can resist the board?! Oh, how I love to do the board. This year, she decided to do a project with sand so I decided no glitter ... but shaker cards!! Yup, the title and all the headers are shaker cards filled with either coarse sand (title) or silica sand (headers). While we didn't place this year, her board looked amazing and it was really fun to watch the people's reactions when they realized that there was sand behind the letters ... and it moved!!! I even had a teacher tell me that while they were setting up they all huddled around the board wanting to play with it. LOL.

Sunday, January 30, 2011

My daughter's popup book report

Outside cover art.

Page One - List of main characters.

Page Two - List the main problem and how it was solved.
Hello out there! I know it's been a LONG time since I've posted but man has it been a busy month!!! My daughter has a book report due on 2/4 and the theme was that it had to be a popup book based on a Newberry Award Winner. She chose Charlotte's Web. Such a lovely book and that one sentence at the end of the second or third to last chapter ALWAYS makes me cry! Sooo ... we happily worked on it today and it came out so cute that I wanted to share it with you all (SUCH A PROUD MOM MOMENT!) :P She had to use the two page format so it's not all that long. (Okay, I helped on the wood pieces on the inside ... shhh. Oh, and the lettering for the title on the front ... but that's it!) LOL.

Materials Used:
  • Paper
  • Prismacolor pencils
  • Martha Stewart Pens
  • Artist's chalk
  • Stamp
  • StayzOn Ink
  • Shrinky Dink paper
  • Acetate
  • Sharpie
  • Acrylic accent
  • Sticker paper

Monday, January 10, 2011

Mmm ... chocolate!

Hi all! I made this little welcome back pack of Hershey's bars for my secret pal at work.

Materials Used:
  • Scrapbook paper
  • Acetate
  • Alcohol Inks
  • White card stock
  • Crop-a-dile and eyelets
  • Martha Stewart Ink set - Chocolate
  • Adhesive

Monday, January 3, 2011

Christmas Wreath Card


Front


Inside


Hi all! This was a simple quick card that I put together for some co-workers.

Materials Used:
  • DCWV Holiday Collection The Christmas Stack - Various sheets
  • White card stock
  • Red paper (for inside)
  • Martha Stewart Snowflake punch (inside)
  • Various sized circle punches
  • Green Ribbon
  • Glue
  •  Red Glitter